You can use two different methods to take a screenshot on a Fire tablet without using any apps.
This Fire tablet how-to guide explains the two methods to easily take screenshots on a Fire tablet: the power button + Volume down key method on all Fire tablets and using the power-off menu in Fire OS 7 and Fire OS 8. The guide also shows you how to edit and share screenshots on Fire tablets.
The results are identical. The two methods will take the same screenshots.
This guide covers all generations of Fire 7, Fire HD 8, Fire HD 10, Fire Max 11, Kindle Fire, Kindle Fire HDX 7, and Kindle Fire HDX 8.9.
Why do you need to take screenshots on a Fire tablet?
Occasionally, you may need to share what's shown on the screen with others or keep a record for yourself.
Sometimes, you may want to show the game progress or show others how to use some apps (or ask for help).
Or you find some interesting illustrations/info in a magazine or a book and want to check them later.
In all these cases, you may need to take screenshots on a Fire tablet. Taking photos for a screen with another device is always a challenge. Screenshots make it easy.
There are at least two methods to take a screenshot on a Fire tablet without using any apps. We now go through them one by one.
Like on any Android phone or tablet, you can simultaneously press and hold the power button and the Volume down button to take a screenshot on a Fire tablet, as shown in the picture below.
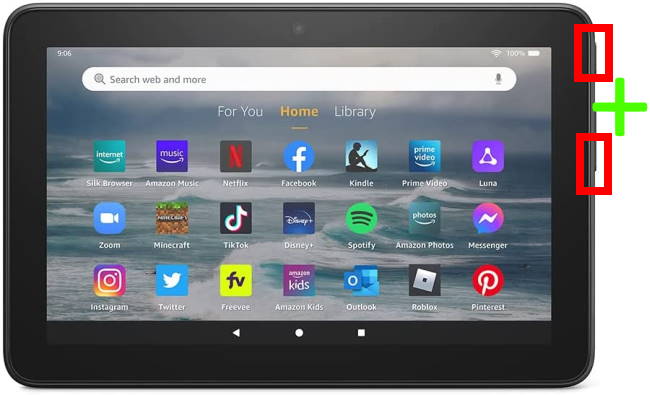
Please note, Amazon swapped the locations of the Power button and Volume button in the 12th Gen Fire 7 (Fire 7 2022) and Fire HD 8 (Fire HD 8 2022), compared to previous generations of the Fire tablet.
There are two important elements of this method:
- Timing.
- Location of the Volume down button.
Timing
Technically, it is almost impossible for us to press and hold two buttons simultaneously.
So, the timing is important. A bit of practice will help you master the timing perfectly.
Sometimes, you may get the volume adjustment window pop-out (as shown in the screenshot below) instead of taking a screenshot on the Fire tablet. It means you pressed the Volume down key too early.
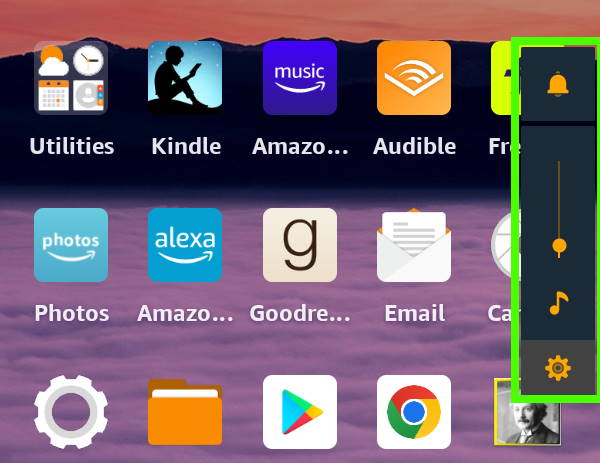
Because the Volume down key responds immediately, you can hold the power button “slightly” (e. g., less than 1 second) earlier. The power button responds only when you hold it for about 1-2 seconds.
You also need to pay attention to the location of the Volume down button. On Fire tablets, the Volume down and volume up are not fixed. They depend on how you hold the tablet.
For example, if you hold the Fire tablet in the landscape orientation, the upper part of the volume button is the Volume up button, and the lower half is the Volume down button. If you hold it upside down, you will find the Volume up and volume down buttons swapped immediately. If you press and hold the Power button and Volume up button concurrently, you will actually raise the Volume, not take a screenshot on the Fire tablet.
Similarly, if you hold the Fire tablet in the portrait orientation, the right part is always the Volume up button, and the left side is always the Volume down button.
You may need to get used to this “smart” feature if you are used to the fixed volume up and volume down buttons, as in most phones and tablets.
Android Pie (Android 9) added a screenshot shortcut in the power-off menu. Fire OS 7, which is based on Android Pie, and Fire OS 8, which is based on Android 10 and 11, implemented this feature.
You can hold the Power button for about 2 seconds to get the power-off menu, as shown in the screenshot below.

You can then tap the screenshot button to take a screenshot on the Fire tablet.
After taking a screenshot on the Fire tablet, you can edit and share it immediately or later at any time. It is up to you.
Regardless of your choice, the screenshot is always saved on the tablet. By default, it will also be uploaded to Amazon Photos.
Immediately after taking the screenshot
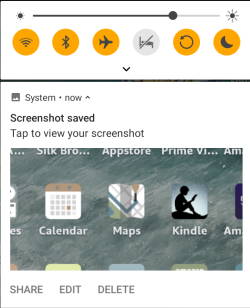
After taking a screenshot on a Fire tablet, a heads-up notification with two buttons: Share and Edit, appears on the screen for about 3 seconds, as shown in the screenshot below.
You can tap the Share button to share it with any supported apps. A list of supported apps that can handle image sharing will show up and let you choose one.
You can also tap the Edit button to edit it, for example, to hide some info in the screenshot. By default, Amazon Photos will be launched to edit the screenshot.
If you have other photo editing apps on the tablet, you will be asked to choose an app (or set the default app) for image editing.
Of course, you can always ignore the options and let the notification disappear after about 3 seconds.


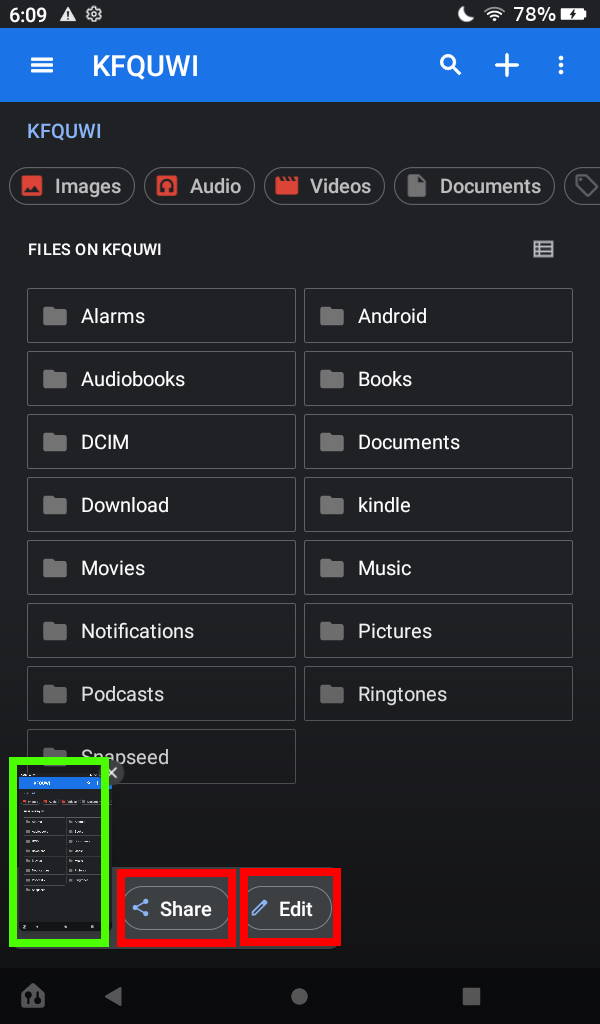
As mentioned, after you take a screenshot on the Fire tablet, the screenshot is always saved automatically in the Screenshots sub-folder under Pictures. Please note photos (taken with the camera) is under the DCIM folder, not the Pictures folder.
If you open the Files app, you can see navigate to the Device and then to the Pictures folder. You will find the screenshot folder, as shown in the animation below.
You can then use the screenshots just like using your photos. You can edit them with any photo editor app and share them through any supported apps.
Can you now take a screenshot on a Fire tablet without using any apps? Do you have any questions about sharing and editing the screenshots?
If you need help taking a screenshot on a Fire tablet or if you have questions about sharing and editing screenshots on a Fire tablet (Fire, Fire HD, Kindle Fire, Kindle Fire HD, and Kindle Fire HDX), please let us know in the comment box below, The community will help you.
Detailed information on how to use the Google Play Store on Fire tablets can be found here.
Need advice on choosing a Fire tablet? Check the Fire Tablet Buyer's Guide now.
You may check other Fire tablet how-to guides and tutorials on the Fire tablet how-to guides page.
You may also reach us via our Facebook page or the contact us form.

Leave a Reply